Lights Tab
Use Lights for individual scene light creation and editing.
These controls map to the underlying Three.js light properties used by React Three Fiber.
Light List#
Controls:
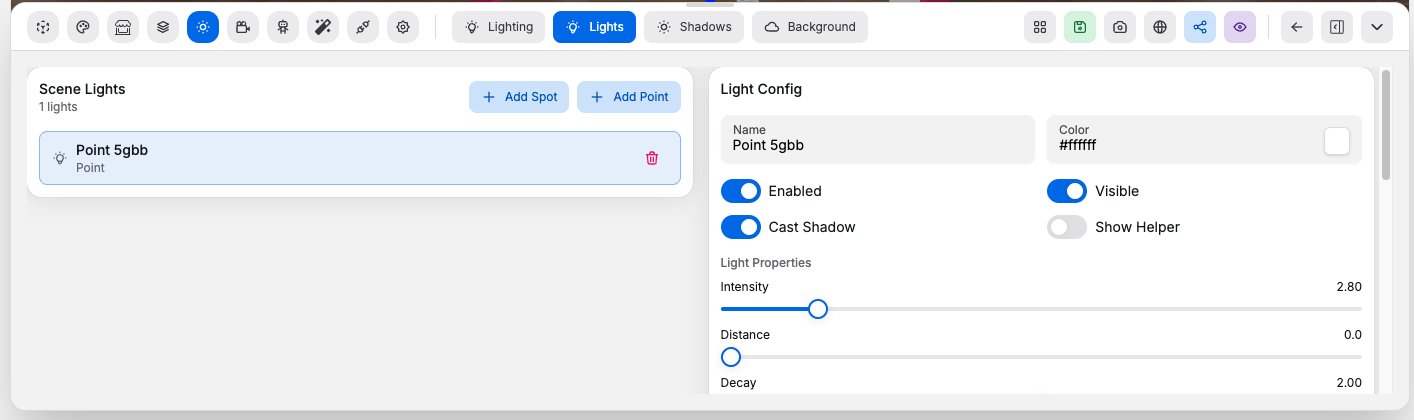
Add Spot: adds a new spotlight to the sceneAdd Point: adds a new point light to the scene- Light selector or light cards: chooses which light you are editing
- Delete action for the selected light: removes the selected light from the room
Core Light Controls#
Controls:
Name: changes the label shown for the light in the editorColor: changes the emitted light colorEnabled: turns the light contribution on or off without deleting itVisible: shows or hides the light object and its visible effect in the sceneCast Shadow: allows that light to produce dynamic shadowsShow Helper: displays a helper so you can see the light position and direction more clearly while editing
Light Properties#
Controls:
Intensity: controls how strong the light is. In Three.js this is the light strength, and higher values make the light brighter.Distance: controls the maximum effective range of the light.0means no cutoff distance.Angle: controls how wide a spotlight cone opens. Larger values widen the cone. This applies to spot lights only.Penumbra: softens the outer edge of a spotlight cone.0gives a hard edge and values closer to1give a softer falloff at the edge. This applies to spot lights only.Decay: controls how quickly the light loses strength over distance. The default physically-correct behavior is usually2.Position: moves the light in 3D space usingX,Y, andZ.Target: controls where a spotlight points. The light aims from its position toward the target position. This applies to spot lights only.
Tracking#
Controls:
Light target tracking: choose whether a directional or spot light aims at a manual target, a chosen object, the current selection, or the cursorTarget object: choose the product, model, or geometry item used by object target trackingLight position tracking: choose whether the light stays in a manual position, follows the cursor, or follows the cameraMovement mode: use manual position, cursor light position, or follow camera movement
Good to know:
- Directional and spot lights can use target tracking
- Point lights only use position tracking because they do not aim at a target
Selectedtarget tracking follows whichever supported scene object is selectedCursortarget tracking updates while the pointer moves across the room canvasFollow camerakeeps the light at the same saved offset from the visitor or editor camera
Shadow Settings#
Controls:
Map Size: increases or reduces shadow-map resolution on larger screensMap Size Mobile: sets a separate shadow-map resolution for mobile devicesCamera Near: defines the near depth range used for shadow renderingCamera Far: defines the far depth range used for shadow renderingCamera Fov: changes the shadow camera field of view for spot lightsShadow Bias: offsets the shadow depth calculation to reduce acne and surface artifactsNormal Bias: offsets shadowing along surface normals, which can help on angled surfacesShadow Radius: softens shadow edges where the shadow type supports itBlur Samples: increases the number of blur samples for softer shadows, at a performance costShadow Intensity: changes how dark the resulting shadows appear
Good to know:
Target,Angle, andPenumbraonly matter for spot lights- Point lights emit in all directions and ignore target-based settings
- Point light shadows are usually more expensive than spot light shadows because they cover all directions